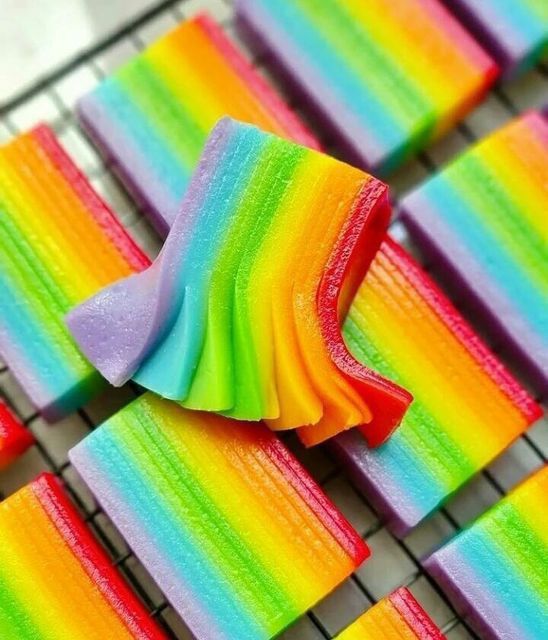
Kue Lapis: The Rainbow-Layered Cake
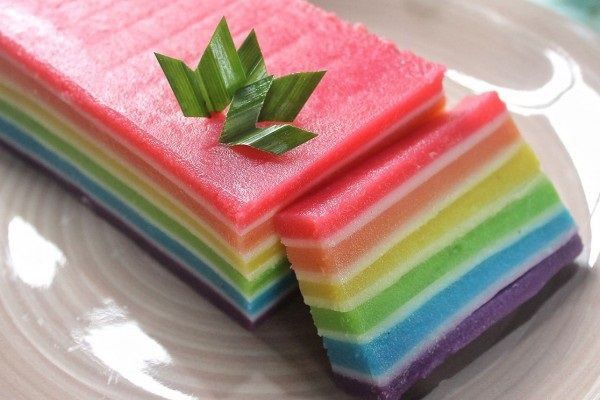
If you’ve ever wanted to eat a rainbow, Kue Lapis is here to make your dreams come true! This Indonesian-Malay steamed layer cake is soft, chewy, slightly sweet, and full of nostalgia. And yes, it’s 100% peel-apart-approved 😄
I remember peeling each layer off one by one as a kid, pretending each was a mini fruit roll-up (anyone else?). The chewy texture, sweet coconut flavor, and vibrant colors instantly made it my favorite. Now, I love recreating it with natural dyes and modern flavors!
What is Kue Lapis? 🍮
Kue Lapis (pronounced koo-eh lah-pees) literally means “layer cake” in Indonesian and Malay. It’s made by steaming colorful layers of rice flour, tapioca flour, coconut milk, sugar, and a pinch of salt. Each layer is cooked individually, which gives it that signature rainbow look and satisfyingly springy texture. It’s the ultimate Southeast Asian childhood treat—and a total vibe!
A Bite of History 🏝️
Kue Lapis has roots across Indonesia, Malaysia, and Singapore, often served during festive occasions, tea time, or special family gatherings. It’s believed to have been influenced by Dutch colonization (yep, the Dutch love their cakes), but local ingredients gave it its unique tropical twist!
Variations You’ll Love 🍵🍫🌺
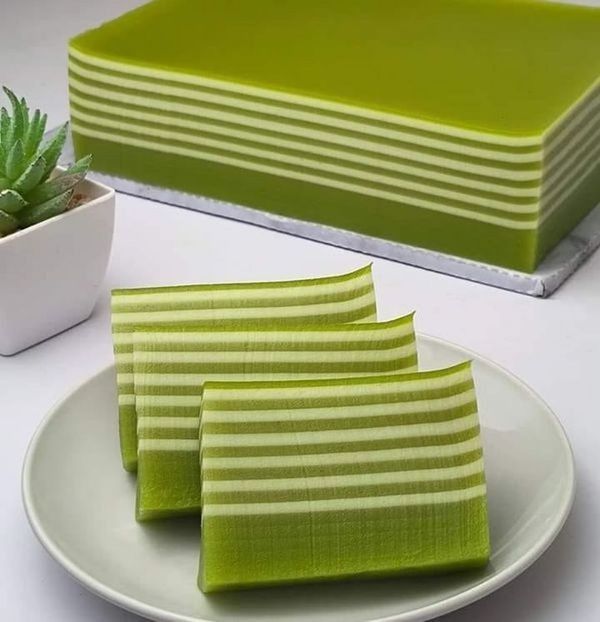
- Matcha Kue Lapis – earthy green tea layers for a Japanese twist
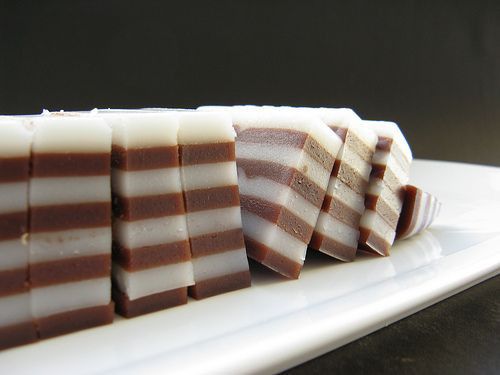
- Chocolate Lapis – for cocoa lovers who need a little indulgence
- Rose or Pandan-flavored – classic floral-scented versions loved across Southeast Asia
- Ombre Lapis – keep it chic with pastel tones instead of rainbow brights
- Fruit-Infused – use blueberry, dragon fruit, or mango juice for natural coloring and fruity hints
Substitutes for kue lapis Ingredients 🛒
Can’t find something? No worries!
- Tapioca flour → Cornstarch (texture will be less chewy but still nice)
- Coconut milk → Oat or almond milk + coconut extract
- Natural colors → Use beet juice, matcha, turmeric, or blue spirulina
The Ultimate Kue Lapis Recipe 🍽️
Ingredients:
- 100g rice flour
- 100g tapioca flour
- 200ml thick coconut milk
- 150ml water
- 100g sugar
- A pinch of salt
- Natural food coloring (at least 3 colors)
Instructions:
- Mix rice flour, tapioca flour, sugar, and salt in a bowl.
- Slowly whisk in water and coconut milk to make a smooth batter.
- Divide into portions and add different colors.
- Pour the first color into a greased, heatproof pan and steam for 5–7 mins.
- Repeat with each layer until done.
- Steam the whole cake for another 10 mins, cool, and slice.
- Eat like a proper lapis lover: layer by layer 😄

Wooden steamer
Wooden steamer has its natural flavor and even more steaming capacity .
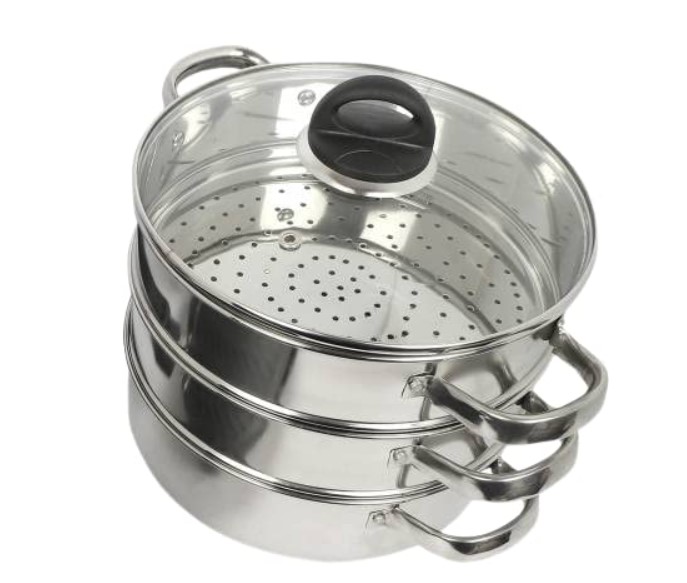
Stainless steel steamer
Stainless Steel Momo Steamer with Glass Lid 24.5cm 3 Tier (Induction & Gas Stove Compatible)

Baking tray or mold
Square Shape Cake Mould | Carbon Steel Baking pan | Can be Used Microwave Oven OTG, Cooker | Cake Making Supplies – 2 in 1 Combo Set

Kue Lapis | Gao Teng kueh |Indonesian steamed dessert
Equipment
- Wooden steamer
- Silicon sheet or molds
- Whisk
- Fine strainer
Ingredients
- 300 ml Thick coconut milk
- 200 g Refined sugar
- 100 g Rice flour
- 150 g Tapioca flour
- 5 ml Vanilla essence optional but tastes better
- 300 ml Warm water
- 5 g Salt
- 1 tsp Food colors traditionally its red, green color.
Instructions
Prepare the Steamer
- Fill your steamer with water and bring it to a boil.
- Keep the heat on medium-high and make sure the lid is wrapped with a clean kitchen towel to prevent water from dripping onto the cake.
Mix the Batter
- In a mixing bowl, combine rice flour, tapioca flour, sugar, and salt.200 g Refined sugar, 100 g Rice flour, 150 g Tapioca flour, 5 g Salt
- Slowly add the warm water while whisking to prevent lumps.300 ml Warm water
- Add the vanilla essence, coconut milk and whisk until the batter is completely smooth.300 ml Thick coconut milk, 5 ml Vanilla essence
- (Optional but recommended) Strain the batter to remove any lumps for a silky texture.
- Divide the batter into equal portions based on how many colors you plan to use (e.g., 3 colors = 3 bowls). white, red and green traditionally.1 tsp Food colors
- Add a few drops of natural or food-safe coloring into each bowl and mix well.
Steam the cake
- Lightly grease your cake pan with oil or butter. You can use square molds, pans as per your preference.
- Place it in the steamer for 1-2 minutes to preheat the pan. This helps the first layer stick well.
- Pour about 4 tablespoons (or enough to cover the base thinly) of the first color into the pan.
- Cover and steam for 5–7 minutes until the layer is firm to the touch.
- Gently pour the next colored layer over the first (use the back of a spoon to avoid disturbing the surface).
- Pro Tip: Always wait for each layer to set before adding the next—if not, the layers may blend or bubble.
- Steam again for 5–7 minutes. Repeat until all the batter is used and you’ve built a beautiful rainbow or ombré effect. Usually repeat like three or four complete 3 color layers.
- Once all layers are done, steam the entire cake for 10–15 minutes to ensure it's fully cooked through.
Cool and Unmold and serve
- Remove from steamer and let the cake cool completely in the pan. It firms up as it cools, making slicing easier. Once cool, loosen the edges with a knife and gently remove the cake.
- Use a greased knife or plastic knife to slice neatly (wiping in between helps!).
- Serve at room temp, and yes—peel those layers apart one by one if you’re feeling playful 😋
Notes
- Rubbery? Too much tapioca or oversteamed—reduce steaming time slightly next time.
- Too soft? Not enough steaming or undercooked layers—add a few minutes per layer if needed.
- Want it firmer? Reduce the liquid slightly or add a touch more rice flour.
Nutrition
Perfect Pairings ☕🍧
- Serve with jasmine tea or iced kopi
- Add a scoop of coconut ice cream on the side
- Pair with other kuih like onde-onde or seri muka for a full platter experience
Storage Tips 🧊
- Store in an airtight container at room temp for 1 day
- For longer storage, refrigerate up to 3 days (just let it sit out before eating for best texture)
- Don’t freeze—it’ll ruin that chewy bounce

Peel. Eat. Repeat. 💫
Kue Lapis is more than just a cake—it’s a playful snack, a nostalgic memory, and a slice of Southeast Asia in rainbow form. Whether you’re making it for a celebration or just to brighten your day, this steamed beauty never fails to impress.
Frequently asked questions
1. Why are my layers blending instead of staying separate? 😣
Problem: Batter layers are merging, causing blurred or wavy lines.
Solution:
- Make sure each layer is fully set before adding the next—steam each layer for 5–7 minutes.
- Gently pour the next layer over the back of a spoon to avoid disturbing the one below.
- Don’t use too much water in the batter—excess liquid makes it harder to hold structure.
2. My Kue Lapis feels rubbery and too chewy! 🫠
Problem: The texture is overly elastic and not pleasant.
Solution:
- Too much tapioca flour can cause this. Try adjusting the ratio (e.g., more rice flour to tapioca, like 120g rice flour to 80g tapioca).
- Also, don’t oversteam each layer or the entire cake—stick to the recommended time.
3. Why does my cake taste bland or too salty? 😐
Problem: Flavor isn’t well-balanced.
Solution:
- Check your coconut milk—some canned versions are already salted. Reduce added salt if so.
- Add a splash of vanilla, pandan extract, or use flavored natural colors (like matcha or cocoa) to amp up the taste.
- Always taste-test the batter before coloring and steaming!
4. The cake is sticking to the pan! How do I fix that? 😬
Problem: Finished Kue Lapis won’t release cleanly.
Solution:
- Thoroughly grease your pan with neutral oil or line it with parchment paper if it’s safe for steaming.
- Let the cake cool completely before removing—it firms up and pulls away from the edges naturally.
5. My layers look uneven—some thick, some thin. What went wrong?
Problem: Inconsistent layer thickness.
Solution:
- Use a measuring cup or ladle to pour the same amount for each layer (e.g., 4 tablespoons per layer).
- Give the pan a gentle tap before steaming each layer to spread the batter evenly.
- Keep your steaming time and batter portions consistent—no rushing allowed!