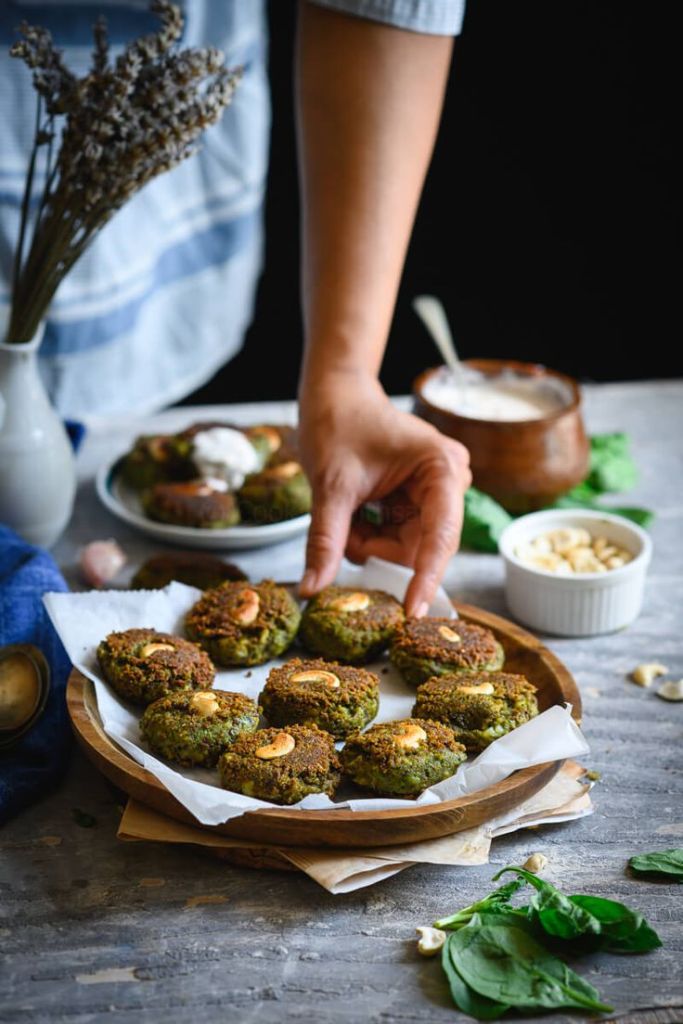
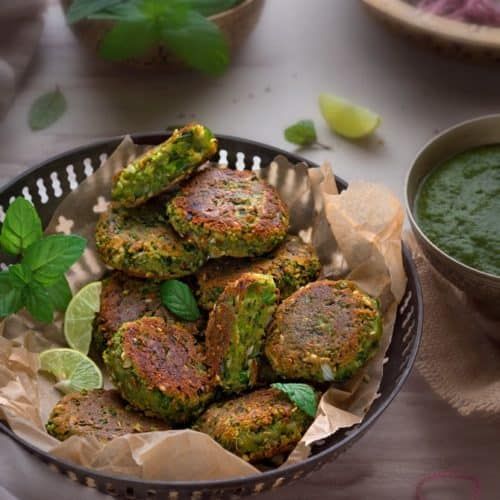
There are vegetarian dishes that quietly exist. And then there’s Hara Bhara Kebab - bright green, perfectly round, crisp outside, soft inside… and suspiciously good.
It’s the kebab that makes people pause mid-bite and say, “Wait… this is vegetarian?”
Yes. And proudly so.
This version is not the basic potato-heavy patty. This is a layered, restaurant-style Hara Bhara Kebab made with mixed vegetables, spinach paste, paneer, cashew, and balanced spices. It’s rich without being heavy. Structured without being dense. Fresh without being bland.
Traditionally, it’s a North Indian vegetarian kebab made from spinach, peas, and potato. But restaurant versions like this one, elevate it with paneer, cashew, and additional vegetables for better texture and richness.
✔ Mixed vegetables for structure ✔ Spinach + spinach paste for depth and color ✔ Paneer for richness ✔ Cashew powder for binding ✔ Proper spice layering
Moisture control is the secret hero here.
HARA BARA KEBAB
This restaurant-style Hara Bhara Kebab is made with spinach, mixed vegetables, paneer, cashew, and aromatic Indian spices. Crispy outside, soft and flavorful inside — a perfect vegetarian appetizer for parties, platters, or festive meals.
Frying pan or skillet
Mixing bowls and spatula
Blender
10 g butter
20 g beans (finely chopped)
20 g carrot (finely chopped)
15 g cauliflower (finely chopped)
20 g boiled potato (mashed)
20 g paneer (optional, remove for vegan version)
5 g garlic (finely chopped)
5 g ginger (grated)
5 g green chili (finely chopped)
10 g spinach (chopped)
30 g spinach paste (palak works beautifully)
10 g green peas (boiled & mashed)
10 g coriander leaves (chopped)
20 g cashew (crushed or finely chopped)
5 g cashew powder
5 g kasoori methi (crushed)
5 g salt (adjust to taste)
10 g garam masala
10 g jeera powder
15 g coriander powder
Refined oil (For frying)
Begin by preparing all your vegetables properly, because texture is everything in this recipe. Finely chop the beans, carrot, and cauliflower so they cook evenly and blend smoothly into the mixture. If your spinach paste is not ready, blanch fresh spinach in boiling water for one minute, immediately transfer it to cold water, squeeze out all excess moisture, and grind it into a smooth paste.
Place a heavy-bottomed pan over medium heat and add the butter. Once the butter melts, add the finely chopped garlic, grated ginger, and green chili. Allow them to sauté gently until aromatic but not browned. This step builds the base flavor of the kebab.
Add the chopped beans, carrot, and cauliflower to the pan. Cook them slowly, stirring occasionally, until they soften and release their moisture. Do not rush this step. The vegetables must cook down slightly and lose excess water; otherwise, the kebabs will break later.
Now add the chopped spinach along with the spinach paste and the mashed green peas. Continue cooking on medium heat, stirring continuously. The mixture will look moist at first, but keep cooking until it thickens and becomes dry enough to hold shape. This moisture reduction stage is critical. If the mixture is wet, the kebabs will absorb oil while frying.
Once the mixture feels thick and no visible moisture remains, turn off the heat and transfer everything into a mixing bowl. Allow it to cool slightly before adding the remaining ingredients.
Add the mashed boiled potato, crumbled paneer, crushed cashew, cashew powder, chopped coriander leaves, crushed kasoori methi, salt, garam masala, jeera powder, and coriander powder. Mix everything thoroughly with your hands until the mixture becomes smooth, cohesive, and firm. It should hold together when pressed.
If the mixture feels too soft, you may let it rest for 10 minutes. Resting helps the binding ingredients settle and firm up naturally.
Once cooled and firm, divide the mixture into equal portions and shape them into round, slightly flattened patties. Press them gently but firmly so there are no cracks on the edges.
Deep Frying (Main Method)
Heat oil in a deep pan or kadai over medium heat. The oil should not be extremely hot. If it is too hot, the outside will brown quickly while the inside remains soft and fragile.
To check the oil temperature, drop a tiny portion of the mixture into the oil. It should rise gradually to the surface without browning instantly.
Carefully slide 2–3 kebabs into the oil at a time. Do not overcrowd the pan. Fry them on medium heat, turning occasionally, until they become evenly golden brown and develop a crisp outer crust. This should take about 3–4 minutes per batch.
Remove the kebabs using a slotted spoon and place them on absorbent paper to drain excess oil.
Deep frying gives the kebabs a uniform golden crust while keeping the inside soft and rich.
Shallow Frying (Optional Method)
If you prefer a lighter version, heat 2–3 tablespoons of oil in a flat pan over medium heat. Place the kebabs in the pan without overcrowding and cook them slowly, flipping gently once the bottom side turns golden. Allow each side to cook completely before turning to prevent breaking.
Shallow frying takes slightly longer and requires patience, but it produces a beautifully crisp surface with less oil absorption.
Air Frying (Optional Alternative)
For a healthier version, brush the kebabs lightly with oil and air fry at 180°C for 12–15 minutes, flipping halfway through, until golden and slightly crisp.
Ensure spinach mixture is dry before mixing to prevent breaking.
Paneer can be skipped for vegan version.
Cashew powder helps binding and adds richness.
Chill mixture 10 minutes if too soft before shaping.
Can be air-fried at 180°C for 12–15 minutes.
Storage
Refrigerate cooked kebabs up to 3 days.
Freeze shaped uncooked patties up to 1 month.
KEBABS
Indian
deep fried kebabs, hara bara, hara bara kebab, kebab, spinach kebab, tandoor
Texture & Flavor Profile
Outside: Lightly crisp and golden Inside: Soft, slightly nutty, fresh and aromatic Flavor: Earthy greens, warm spice, subtle richness
It’s comforting without being greasy.
Deep Frying vs Shallow Frying – What’s Better?
Here’s the honest breakdown:
Method
Texture
Oil Use
Difficulty
Result
Deep Frying
Evenly crisp
Higher
Easy
Restaurant-style golden crust
Shallow Frying
Slightly softer crust
Moderate
Medium
Homestyle crisp finish
Air Frying
Lightly crisp
Minimal
Easy
Health-conscious version
Deep frying gives the most uniform crust and structure. Shallow frying works beautifully with patience.
Most likely too much moisture. Spinach must be cooked down properly. If still soft, chill mixture 10–15 minutes before shaping.
Can I make Hara Bhara Kebab vegan?
Yes. Remove paneer and increase cashew powder slightly for binding.
Can I freeze them?
Absolutely. Shape and freeze before frying. Fry directly from frozen on medium heat.
Why is my kebab not green?
Overcooked spinach or too much browning during sautéing. Cook greens just until moisture evaporates.
Can I bake instead of fry?
Yes. Bake at 180°C for 18–20 minutes, flipping halfway.
Chef Tips for Perfect hara bhara kebab
Always reduce moisture before mixing.
Rest mixture before shaping.
Medium heat frying prevents burning.
Avoid overcrowding oil.
Little details make big differences.
Final Thoughts
Hara Bhara Kebab proves that vegetarian starters can be bold, textured, and deeply satisfying.
It’s vibrant. It’s layered. It’s slightly luxurious. And it disappears fast.
Once you master moisture control and proper frying, this becomes one of those recipes you return to again and again.
There are vegetarian dishes that quietly exist. And then there’s Hara Bhara Kebab - bright green, perfectly round, crisp outside, soft inside… and suspiciously good.
It’s the kebab that makes people pause mid-bite and say, “Wait… this is vegetarian?”
Yes. And proudly so.
This version is not the basic potato-heavy patty. This is a layered, restaurant-style Hara Bhara Kebab made with mixed vegetables, spinach paste, paneer, cashew, and balanced spices. It’s rich without being heavy. Structured without being dense. Fresh without being bland.
Traditionally, it’s a North Indian vegetarian kebab made from spinach, peas, and potato. But restaurant versions like this one, elevate it with paneer, cashew, and additional vegetables for better texture and richness.
✔ Mixed vegetables for structure ✔ Spinach + spinach paste for depth and color ✔ Paneer for richness ✔ Cashew powder for binding ✔ Proper spice layering
Moisture control is the secret hero here.
HARA BARA KEBAB
This restaurant-style Hara Bhara Kebab is made with spinach, mixed vegetables, paneer, cashew, and aromatic Indian spices. Crispy outside, soft and flavorful inside — a perfect vegetarian appetizer for parties, platters, or festive meals.
Frying pan or skillet
Mixing bowls and spatula
Blender
10 g butter
20 g beans (finely chopped)
20 g carrot (finely chopped)
15 g cauliflower (finely chopped)
20 g boiled potato (mashed)
20 g paneer (optional, remove for vegan version)
5 g garlic (finely chopped)
5 g ginger (grated)
5 g green chili (finely chopped)
10 g spinach (chopped)
30 g spinach paste (palak works beautifully)
10 g green peas (boiled & mashed)
10 g coriander leaves (chopped)
20 g cashew (crushed or finely chopped)
5 g cashew powder
5 g kasoori methi (crushed)
5 g salt (adjust to taste)
10 g garam masala
10 g jeera powder
15 g coriander powder
Refined oil (For frying)
Begin by preparing all your vegetables properly, because texture is everything in this recipe. Finely chop the beans, carrot, and cauliflower so they cook evenly and blend smoothly into the mixture. If your spinach paste is not ready, blanch fresh spinach in boiling water for one minute, immediately transfer it to cold water, squeeze out all excess moisture, and grind it into a smooth paste.
Place a heavy-bottomed pan over medium heat and add the butter. Once the butter melts, add the finely chopped garlic, grated ginger, and green chili. Allow them to sauté gently until aromatic but not browned. This step builds the base flavor of the kebab.
Add the chopped beans, carrot, and cauliflower to the pan. Cook them slowly, stirring occasionally, until they soften and release their moisture. Do not rush this step. The vegetables must cook down slightly and lose excess water; otherwise, the kebabs will break later.
Now add the chopped spinach along with the spinach paste and the mashed green peas. Continue cooking on medium heat, stirring continuously. The mixture will look moist at first, but keep cooking until it thickens and becomes dry enough to hold shape. This moisture reduction stage is critical. If the mixture is wet, the kebabs will absorb oil while frying.
Once the mixture feels thick and no visible moisture remains, turn off the heat and transfer everything into a mixing bowl. Allow it to cool slightly before adding the remaining ingredients.
Add the mashed boiled potato, crumbled paneer, crushed cashew, cashew powder, chopped coriander leaves, crushed kasoori methi, salt, garam masala, jeera powder, and coriander powder. Mix everything thoroughly with your hands until the mixture becomes smooth, cohesive, and firm. It should hold together when pressed.
If the mixture feels too soft, you may let it rest for 10 minutes. Resting helps the binding ingredients settle and firm up naturally.
Once cooled and firm, divide the mixture into equal portions and shape them into round, slightly flattened patties. Press them gently but firmly so there are no cracks on the edges.
Deep Frying (Main Method)
Heat oil in a deep pan or kadai over medium heat. The oil should not be extremely hot. If it is too hot, the outside will brown quickly while the inside remains soft and fragile.
To check the oil temperature, drop a tiny portion of the mixture into the oil. It should rise gradually to the surface without browning instantly.
Carefully slide 2–3 kebabs into the oil at a time. Do not overcrowd the pan. Fry them on medium heat, turning occasionally, until they become evenly golden brown and develop a crisp outer crust. This should take about 3–4 minutes per batch.
Remove the kebabs using a slotted spoon and place them on absorbent paper to drain excess oil.
Deep frying gives the kebabs a uniform golden crust while keeping the inside soft and rich.
Shallow Frying (Optional Method)
If you prefer a lighter version, heat 2–3 tablespoons of oil in a flat pan over medium heat. Place the kebabs in the pan without overcrowding and cook them slowly, flipping gently once the bottom side turns golden. Allow each side to cook completely before turning to prevent breaking.
Shallow frying takes slightly longer and requires patience, but it produces a beautifully crisp surface with less oil absorption.
Air Frying (Optional Alternative)
For a healthier version, brush the kebabs lightly with oil and air fry at 180°C for 12–15 minutes, flipping halfway through, until golden and slightly crisp.
Ensure spinach mixture is dry before mixing to prevent breaking.
Paneer can be skipped for vegan version.
Cashew powder helps binding and adds richness.
Chill mixture 10 minutes if too soft before shaping.
Can be air-fried at 180°C for 12–15 minutes.
Storage
Refrigerate cooked kebabs up to 3 days.
Freeze shaped uncooked patties up to 1 month.
KEBABS
Indian
deep fried kebabs, hara bara, hara bara kebab, kebab, spinach kebab, tandoor
Texture & Flavor Profile
Outside: Lightly crisp and golden Inside: Soft, slightly nutty, fresh and aromatic Flavor: Earthy greens, warm spice, subtle richness
It’s comforting without being greasy.
Deep Frying vs Shallow Frying – What’s Better?
Here’s the honest breakdown:
Method
Texture
Oil Use
Difficulty
Result
Deep Frying
Evenly crisp
Higher
Easy
Restaurant-style golden crust
Shallow Frying
Slightly softer crust
Moderate
Medium
Homestyle crisp finish
Air Frying
Lightly crisp
Minimal
Easy
Health-conscious version
Deep frying gives the most uniform crust and structure. Shallow frying works beautifully with patience.