Homemade Paneer: A Creamy Delight You Can Master at Home
Homemade Paneer, or Indian cottage cheese, has been a staple in my kitchen for as long as I can remember. Growing up, my grandmother made it fresh for every special occasion, and I still remember the soft, pillowy cubes soaking in warm water, waiting to be transformed into dishes like palak paneer or paneer tikka masala. While store-bought paneer is convenient, there’s something deeply satisfying about making your own. Plus, it tastes fresher, is preservative-free, and can be customized to your liking.
Paneer has its roots in the Indian subcontinent and is believed to have been introduced by Persian and Afghan invaders around the 16th century. Unlike many cheeses that use rennet for coagulation, paneer is made with natural acids like lemon juice or vinegar, making it a vegetarian-friendly option. Today, paneer is a cornerstone of Indian cuisine and is widely loved in dishes across South Asia and beyond.
Homemade paneer recipe
Step-by-Step Guide to Homemade Paneer (Let’s Get Cheesy! )
1. Gather Your Ingredients:
1 liter (4 cups) full-fat milk (the creamier, the better!)
2-3 tablespoons lemon juice or vinegar (your magical curdling agent)
A pinch of patience (optional but helpful).
2. Heat the Milk (Warm It Up!):
Pour the milk into a large pot and heat it over medium flame.
Stir occasionally so it doesn’t scorch at the bottom. Keep an eye on it, milk likes to spill over just when you look away!
3. Add the Magic (Curdling Time!):
When the milk starts bubbling gently, lower the heat.
Add your lemon juice or vinegar, one tablespoon at a time, stirring slowly. Watch the milk separate into fluffy white curds and a yellowish liquid (that’s whey- say hi!).
4. Strain the Curds (Goodbye, Whey!):
Place a clean muslin cloth or cheesecloth over a colander and pour the curdled milk through it.
Rinse the curds with cold water to remove any lemony taste. (You don’t want tangy paneer unless that’s your thing!)
5. Squeeze and Press (Paneer Workout!):
Gather the cloth into a bundle and twist it gently to squeeze out excess whey.
Place the bundle on a plate, put a heavy object on top (like a pot or a cookbook), and let it press for 30 minutes to 1 hour.
6. Unwrap and Ta-da! (The Big Reveal):
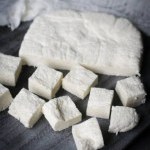
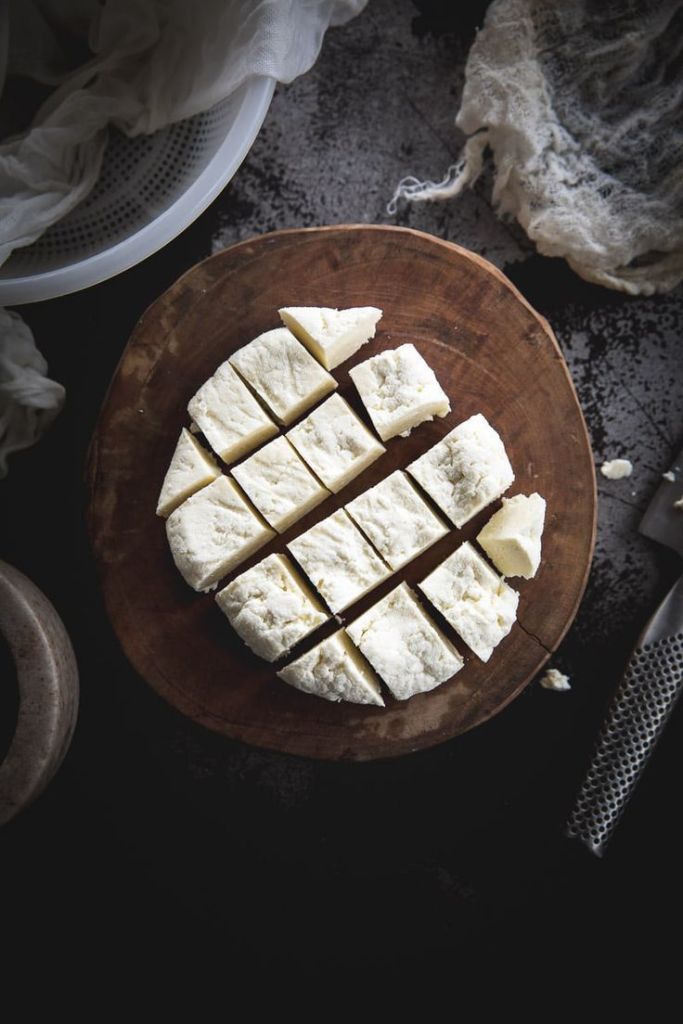
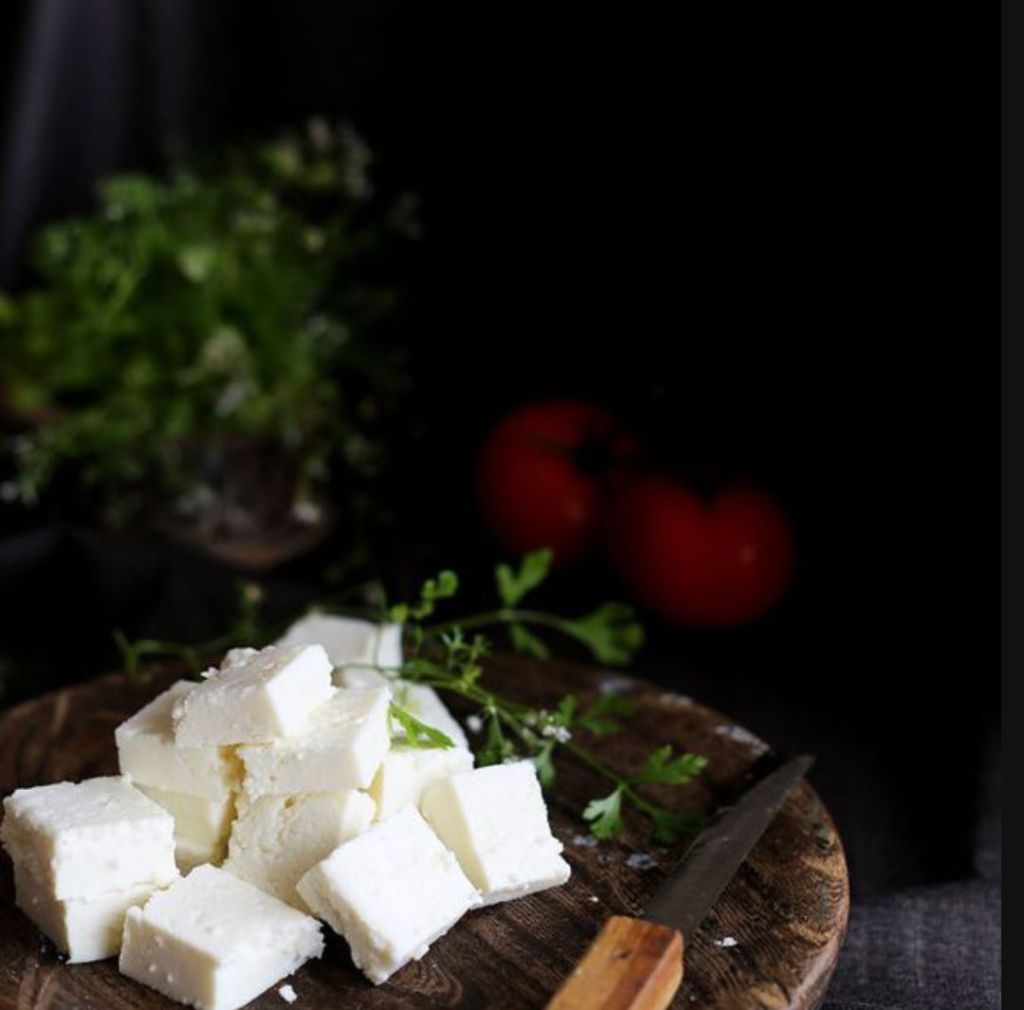
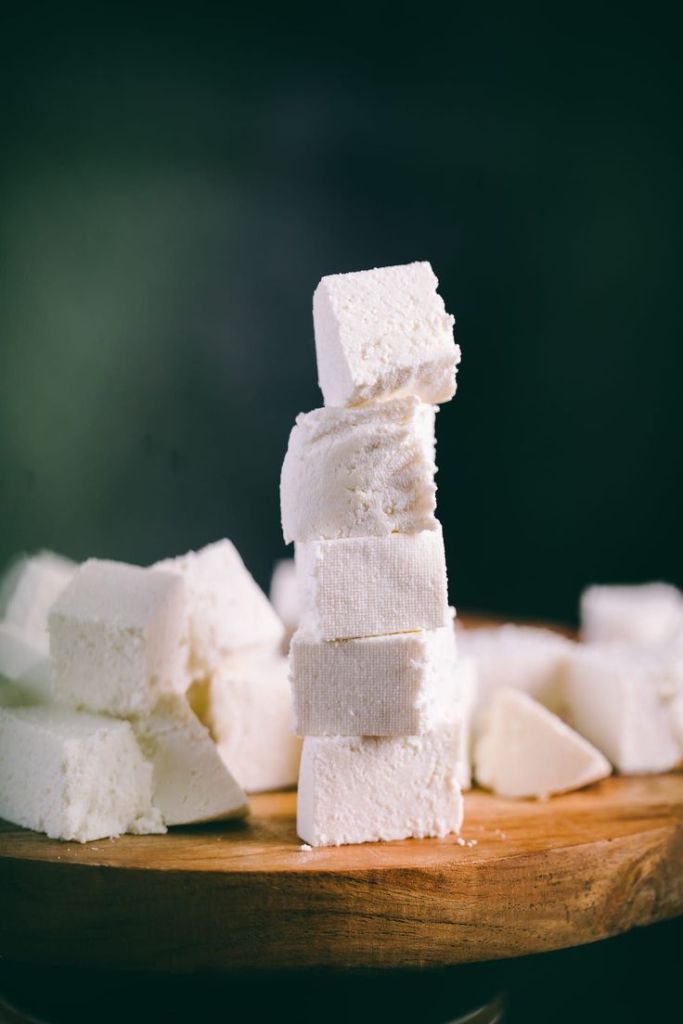
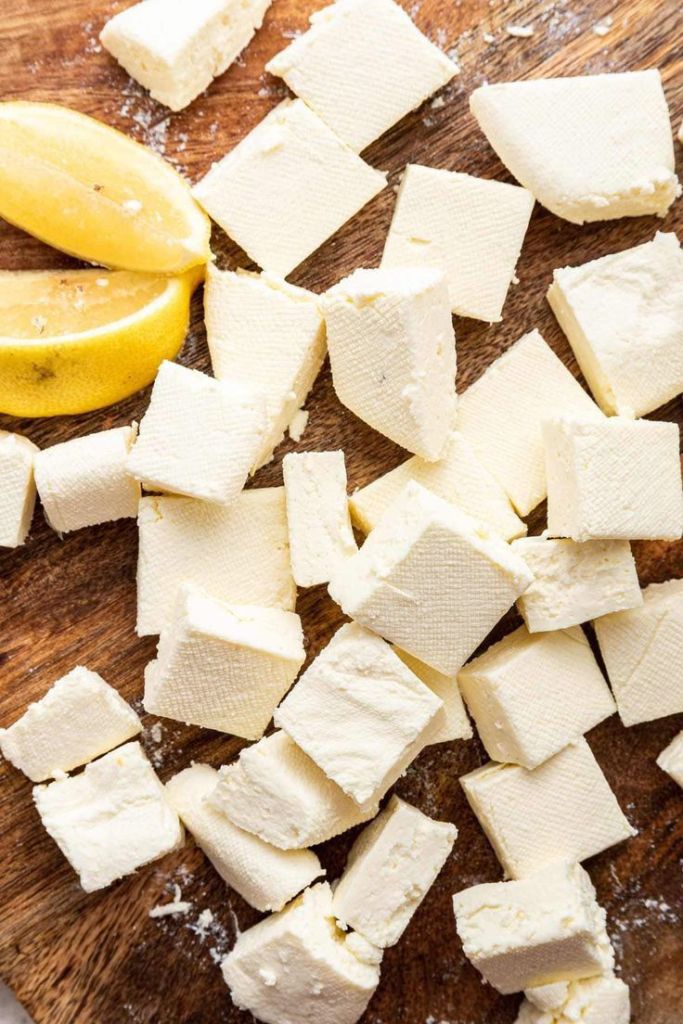
Unwrap your paneer, and there it is fresh, soft, and oh-so-satisfying! Slice it, crumble it, or mold it into cubes.
7. Store or Cook (The Fun Part):
Use your homemade paneer right away in curries, snacks, or desserts, or refrigerate it in an airtight container for up to 2 days.
Pro Tip: Save the whey! It’s great for kneading dough or adding to soups and smoothies. Waste not, want not!
Enjoy the feeling of making paneer from scratch, it’s like kitchen magic, and you’re the wizard!
How to make paneer- Indian Cottage cheese
Paneer is a soft cheese made from curdling the milk with acids like vinegar or lemon juice.
It is usually made with high fat content milk from cow or buffalo. The paneer quantity and quality depends on the fat percentage present in the milk.
Cooking pot
Cheese cloth
Strainer
3 l Full fat milk
15 ml Lemon juice or vinegar
Water (To rinse)
In a sauce pan or pot add full fat milk and let it come to first boil. Stir occasionally so it doesn’t scorch at the bottom. Keep an eye on it, milk likes to spill over just when you look away!
Once it started boiling, squeeze a lemon and stir it up slowly for an minute and switch off the flame.
The solidified milk fat is called chhena and the water is called whey.
Place a clean muslin cloth or cheesecloth over a colander and pour the curdled milk through it. Rinse the curds with cold water to remove any lemony taste. (You don’t want tangy paneer unless that’s your thing!)
Squeeze the water to 70 percent and start moulding into square shape using the cloth itself and keep a weight above it for about 2hours. If you wanted softer paneer approximately 20-25minutes pressing is enough.
Unwrap your paneer, and there it is—fresh, soft, and oh-so-satisfying! Slice it, crumble it, or mold it into cubes.
Save the whey! It’s great for kneading dough or adding to soups and smoothies. Waste not, want not!
Overview:
Name: paneer
Age: unripened or un aged.
Type: soft cheese
Origin: India, Persian, Portugese
Source: Cow or buffalo
Alternative: Cottage cheese
Acidulation: lemon juice or vinegar
Texture: firm and solid
Taste: Mildly sweeter
Cheese
Indian
cottage cheese recipe, history of paneer, how to make paneer, how to make paneer easily, origin of paneer, paneer, paneer in home, paneer recipe, what is paneer
Why Paneer is Famous
Paneer is famous for its versatility and ability to soak up flavors, making it the perfect base for curries, snacks, and even desserts. Its mild, creamy texture pairs beautifully with bold spices and sauces. Being a vegetarian-friendly protein, it’s also a go-to ingredient in Indian households and a popular choice in global vegetarian menus. Whether it’s the smoky flavor of paneer tikka or the richness of shahi paneer, this humble cheese shines in every form.
Variations of Paneer
Masala Paneer: Add a pinch of turmeric or chili powder to the milk for spiced paneer.
Herbed Paneer: Mix chopped herbs like cilantro, mint, or basil into the curds before pressing.
Paneer with Nuts: Blend in finely chopped nuts like almonds or pistachios for a rich twist.
Substitutes for Paneer
Tofu: A plant-based alternative with a similar texture, perfect for vegan dishes.
Halloumi: A firmer cheese that works well in grilled recipes.
1. Always use full-fat milk for creamier paneer. 2. Avoid over-stirring the milk after adding lemon juice; gentle stirring helps form better curds. 3. Use a heavy weight for firmer paneer or a lighter press for softer textures. 4. Store paneer in cold water to keep it fresh and prevent it from drying out.
Pairings That Elevate Paneer
Homemade paneer pairs beautifully with dishes like palak paneer, kadhai paneer, or even as a filling for wraps and sandwiches. It’s also a great addition to salads, skewers, or sweet treats like rasgulla and sandesh.
Fun Facts About Paneer
1. Paneer is one of the few cheeses that doesn’t melt when heated, making it perfect for frying and grilling.
2. India is one of the largest consumers of paneer, with regional variations in preparation and use.
3. The word "paneer" is derived from the Persian word "panir," meaning cheese.
FAQs About Homemade Paneer
What can I do with leftover whey?
Use it in soups, curries, or as a substitute for water in baking recipes.
How long does homemade paneer last?
Homemade paneer stays fresh in the refrigerator for up to 3 days if stored in water.
Can I use low-fat milk to make paneer?
Yes, but the texture will be less creamy, and the yield will be lower.
For more questions and doubts check out the paneer FAQ page.
A Creamy Conclusion
Homemade paneer isn’t just a recipe; it’s an experience. The joy of watching milk transform into curds and pressing it into a soft, versatile cheese is unmatched. Whether you’re making a comforting curry or experimenting with new flavors, homemade paneer is your secret weapon for adding creaminess and charm to any dish. Give it a try you’ll never look at store-bought paneer the same way again!
Homemade Paneer: A Creamy Delight You Can Master at Home
Homemade Paneer, or Indian cottage cheese, has been a staple in my kitchen for as long as I can remember. Growing up, my grandmother made it fresh for every special occasion, and I still remember the soft, pillowy cubes soaking in warm water, waiting to be transformed into dishes like palak paneer or paneer tikka masala. While store-bought paneer is convenient, there’s something deeply satisfying about making your own. Plus, it tastes fresher, is preservative-free, and can be customized to your liking.
Paneer has its roots in the Indian subcontinent and is believed to have been introduced by Persian and Afghan invaders around the 16th century. Unlike many cheeses that use rennet for coagulation, paneer is made with natural acids like lemon juice or vinegar, making it a vegetarian-friendly option. Today, paneer is a cornerstone of Indian cuisine and is widely loved in dishes across South Asia and beyond.
Homemade paneer recipe
Step-by-Step Guide to Homemade Paneer (Let’s Get Cheesy! )
1. Gather Your Ingredients:
1 liter (4 cups) full-fat milk (the creamier, the better!)
2-3 tablespoons lemon juice or vinegar (your magical curdling agent)
A pinch of patience (optional but helpful).
2. Heat the Milk (Warm It Up!):
Pour the milk into a large pot and heat it over medium flame.
Stir occasionally so it doesn’t scorch at the bottom. Keep an eye on it, milk likes to spill over just when you look away!
3. Add the Magic (Curdling Time!):
When the milk starts bubbling gently, lower the heat.
Add your lemon juice or vinegar, one tablespoon at a time, stirring slowly. Watch the milk separate into fluffy white curds and a yellowish liquid (that’s whey- say hi!).
4. Strain the Curds (Goodbye, Whey!):
Place a clean muslin cloth or cheesecloth over a colander and pour the curdled milk through it.
Rinse the curds with cold water to remove any lemony taste. (You don’t want tangy paneer unless that’s your thing!)
5. Squeeze and Press (Paneer Workout!):
Gather the cloth into a bundle and twist it gently to squeeze out excess whey.
Place the bundle on a plate, put a heavy object on top (like a pot or a cookbook), and let it press for 30 minutes to 1 hour.
6. Unwrap and Ta-da! (The Big Reveal):
Unwrap your paneer, and there it is fresh, soft, and oh-so-satisfying! Slice it, crumble it, or mold it into cubes.
7. Store or Cook (The Fun Part):
Use your homemade paneer right away in curries, snacks, or desserts, or refrigerate it in an airtight container for up to 2 days.
Pro Tip: Save the whey! It’s great for kneading dough or adding to soups and smoothies. Waste not, want not!
Enjoy the feeling of making paneer from scratch, it’s like kitchen magic, and you’re the wizard!
How to make paneer- Indian Cottage cheese
Paneer is a soft cheese made from curdling the milk with acids like vinegar or lemon juice.
It is usually made with high fat content milk from cow or buffalo. The paneer quantity and quality depends on the fat percentage present in the milk.
Cooking pot
Cheese cloth
Strainer
3 l Full fat milk
15 ml Lemon juice or vinegar
Water (To rinse)
In a sauce pan or pot add full fat milk and let it come to first boil. Stir occasionally so it doesn’t scorch at the bottom. Keep an eye on it, milk likes to spill over just when you look away!
Once it started boiling, squeeze a lemon and stir it up slowly for an minute and switch off the flame.
The solidified milk fat is called chhena and the water is called whey.
Place a clean muslin cloth or cheesecloth over a colander and pour the curdled milk through it. Rinse the curds with cold water to remove any lemony taste. (You don’t want tangy paneer unless that’s your thing!)
Squeeze the water to 70 percent and start moulding into square shape using the cloth itself and keep a weight above it for about 2hours. If you wanted softer paneer approximately 20-25minutes pressing is enough.
Unwrap your paneer, and there it is—fresh, soft, and oh-so-satisfying! Slice it, crumble it, or mold it into cubes.
Save the whey! It’s great for kneading dough or adding to soups and smoothies. Waste not, want not!
Overview:
Name: paneer
Age: unripened or un aged.
Type: soft cheese
Origin: India, Persian, Portugese
Source: Cow or buffalo
Alternative: Cottage cheese
Acidulation: lemon juice or vinegar
Texture: firm and solid
Taste: Mildly sweeter
Cheese
Indian
cottage cheese recipe, history of paneer, how to make paneer, how to make paneer easily, origin of paneer, paneer, paneer in home, paneer recipe, what is paneer
Why Paneer is Famous
Paneer is famous for its versatility and ability to soak up flavors, making it the perfect base for curries, snacks, and even desserts. Its mild, creamy texture pairs beautifully with bold spices and sauces. Being a vegetarian-friendly protein, it’s also a go-to ingredient in Indian households and a popular choice in global vegetarian menus. Whether it’s the smoky flavor of paneer tikka or the richness of shahi paneer, this humble cheese shines in every form.
Variations of Paneer
Masala Paneer: Add a pinch of turmeric or chili powder to the milk for spiced paneer.
Herbed Paneer: Mix chopped herbs like cilantro, mint, or basil into the curds before pressing.
Paneer with Nuts: Blend in finely chopped nuts like almonds or pistachios for a rich twist.
Substitutes for Paneer
Tofu: A plant-based alternative with a similar texture, perfect for vegan dishes.
Halloumi: A firmer cheese that works well in grilled recipes.
1. Always use full-fat milk for creamier paneer. 2. Avoid over-stirring the milk after adding lemon juice; gentle stirring helps form better curds. 3. Use a heavy weight for firmer paneer or a lighter press for softer textures. 4. Store paneer in cold water to keep it fresh and prevent it from drying out.
Pairings That Elevate Paneer
Homemade paneer pairs beautifully with dishes like palak paneer, kadhai paneer, or even as a filling for wraps and sandwiches. It’s also a great addition to salads, skewers, or sweet treats like rasgulla and sandesh.
Fun Facts About Paneer
1. Paneer is one of the few cheeses that doesn’t melt when heated, making it perfect for frying and grilling.
2. India is one of the largest consumers of paneer, with regional variations in preparation and use.
3. The word "paneer" is derived from the Persian word "panir," meaning cheese.
FAQs About Homemade Paneer
What can I do with leftover whey?
Use it in soups, curries, or as a substitute for water in baking recipes.
How long does homemade paneer last?
Homemade paneer stays fresh in the refrigerator for up to 3 days if stored in water.
Can I use low-fat milk to make paneer?
Yes, but the texture will be less creamy, and the yield will be lower.
For more questions and doubts check out the paneer FAQ page.
A Creamy Conclusion
Homemade paneer isn’t just a recipe; it’s an experience. The joy of watching milk transform into curds and pressing it into a soft, versatile cheese is unmatched. Whether you’re making a comforting curry or experimenting with new flavors, homemade paneer is your secret weapon for adding creaminess and charm to any dish. Give it a try you’ll never look at store-bought paneer the same way again!